
There’s something quietly satisfying about turning everyday vegetables into crispy, snackable chips that celebrate their natural textures. No heavy oil, no complicated seasonings—just simple oven magic that makes the vegetables themselves shine. It’s like giving them a new life, a crunchy, wholesome upgrade that’s hard to resist.
I’ve always loved the idea of focusing on what vegetables can do when left to their own devices. These baked chips are a reminder that sometimes, less is more—crisp, slightly caramelized edges and pure veggie flavor without the greasy guilt. Plus, it’s a great way to use up those odd-shaped carrots or stubborn sweet potatoes lurking in the crisper.
This recipe is about patience and a little bit of finesse. It’s not just about baking; it’s about watching those thin slices turn golden and crispy, learning to read their signals of doneness. It’s a small act of kitchen mindfulness, turning humble produce into something snack-worthy that feels just a bit more special.
Focusing on the overlooked charm of turning humble vegetables into crispy, snackable chips that highlight their natural textures and flavors, rather than masking them with seasoning or deep frying.
The inspiration behind these chips
- One rainy afternoon, I was rummaging through my veggie drawer, frustrated at the pile of oddly shaped carrots and sad sweet potatoes. Instead of tossing them out, I sliced them thin, seasoned with just a pinch of salt, and baked them until they crackled and curled up crispy. That moment made me realize how much flavor and texture can come from simple, honest ingredients, if you treat them right.
- It’s those little kitchen experiments that remind me why I love cooking—transforming what seems mundane into something snack-worthy, without fuss. These chips aren’t about perfection; they’re about appreciating the natural beauty of vegetables, crisped to a tender crunch. It’s a humble, satisfying process that turns everyday produce into a small, crunchy celebration.
- heading: ‘The story behind this recipe’
Ingredient breakdown: key components
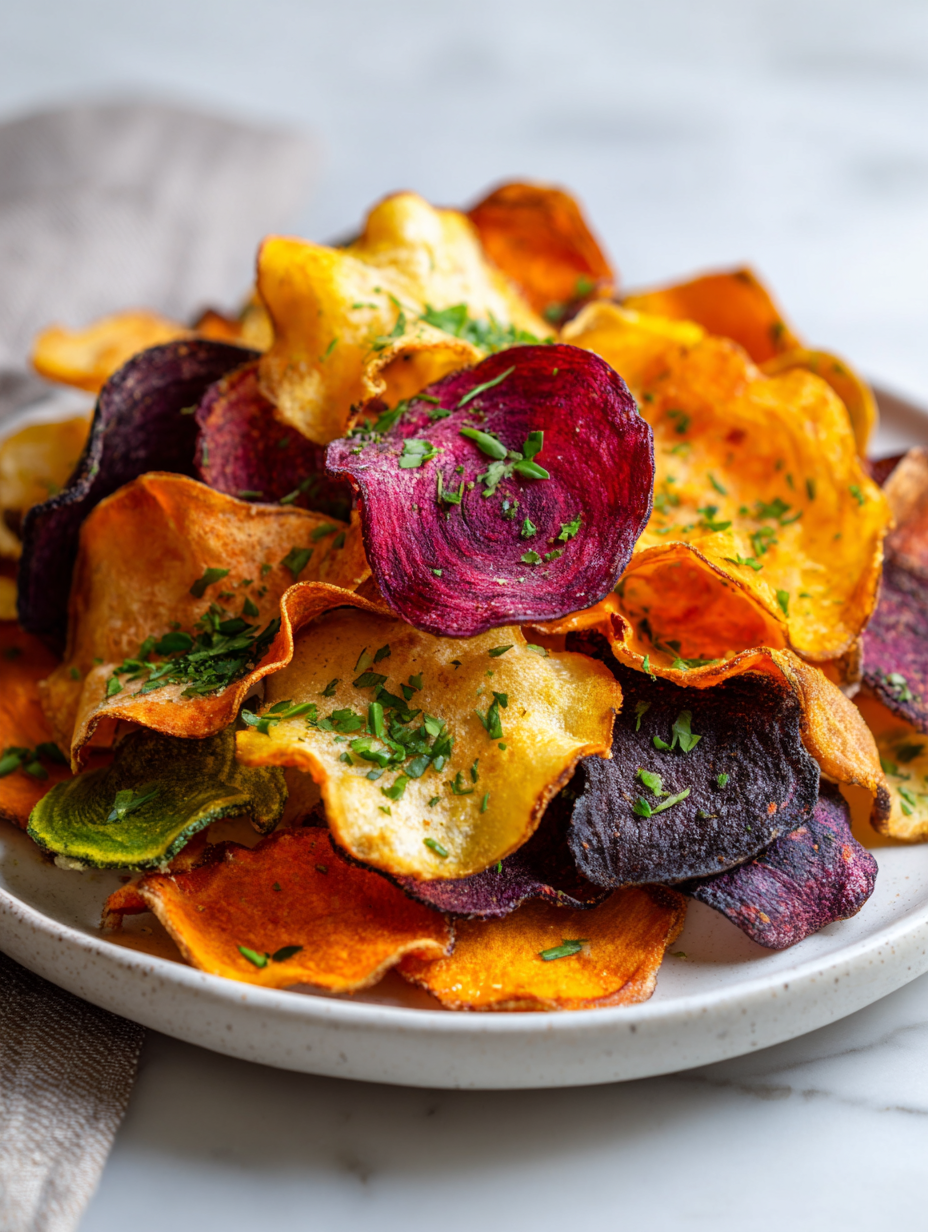
- Sweet potatoes: I love their natural sweetness and earthy flavor, which caramelizes beautifully in the oven. For a milder taste, try yams—just watch their moisture release. Their vibrant orange hue adds a cheerful pop to your snack platter.
- Zucchini: Thin slices of zucchini turn crispy and slightly smoky when baked. If you prefer less water, pat them dry thoroughly before baking. Using a mandoline helps get that even, paper-thin slice that crisps up just right.
- Beets: These give a stunning deep ruby color and a subtle sweetness that intensifies as they bake. To keep them from bleeding onto other chips, slice and dry well, and consider layering them separately. Their earthy aroma is a cozy reminder of root cellar days.
- Carrots: They’re naturally sweet, and their crunch is irresistible. For more flavor, toss them with a pinch of cumin or cinnamon before baking. Thin, even slices help them crisp up uniformly, avoiding that chewy center.
- Kale stems: Don’t toss those sturdy stems—they crisp up into a surprisingly crunchy snack. Slice them thinly, and they’ll turn into little crispy sticks with a slightly grassy, fresh flavor. They’re a great way to use every bit of your kale bunch.
- Parsnips: Their nutty, sweet profile shines through once baked. Slice them thin and dry thoroughly—moisture is the enemy here. They give a delicate, earthy aroma that’s perfect for a rustic crunch.
- Seasonings: Keep it simple—just a sprinkle of sea salt and a hint of smoked paprika or garlic powder. Sometimes, the best flavor comes from enhancing the vegetable’s natural taste, not masking it.
Spotlight on key ingredients
Sweet potatoes & Zucchini:
- Sweet potatoes: I love their natural sweetness and earthy flavor, which caramelizes beautifully in the oven. For a milder taste, try yams—just watch their moisture release. Their vibrant orange hue adds a cheerful pop to your snack platter.
- Zucchini: Thin slices of zucchini turn crispy and slightly smoky when baked. If you prefer less water, pat them dry thoroughly before baking. Using a mandoline helps get that even, paper-thin slice that crisps up just right.
Notes for ingredient swaps
- Dairy-Free: Omit butter or cheese; use olive oil for a lighter, more vegetal flavor.
- Low-Sodium: Skip added salt; rely on natural vegetable sweetness and herbs for flavor.
- Gluten-Free: Ensure seasonings are gluten-free; most spices and oils are naturally safe.
- Vegan: Use plant-based oils and skip any animal-derived seasonings; keeps it simple and pure.
- Extra Crunch: Add a sprinkle of nutritional yeast or crushed nuts after baking for more texture.
- Sweet Variations: Swap savory seasonings for cinnamon and a touch of sugar for a sweet snack twist.
- Herb Boost: Mix in fresh or dried herbs like thyme or rosemary before baking for an aromatic punch.
Equipment & Tools
- Mandoline or sharp knife: To slice vegetables evenly and thinly for uniform crisping.
- Baking sheet: To hold the vegetable slices during baking.
- Parchment paper or silicone mat: To prevent sticking and facilitate easy cleanup.
- Tongs or spatula: To flip or reposition slices if needed during baking.
- Wire rack: To cool the chips and help them crisp as they rest.
Step-by-step guide to vegetable chips
- Preheat your oven to 180°C (350°F). Line a baking sheet with parchment paper or a silicone mat for easy cleanup.
- Choose your vegetables—thin slices work best. Use a mandoline or sharp knife to get uniform, 1-2mm thick slices.
- Arrange the slices on the prepared baking sheet in a single layer, making sure they don’t overlap or touch. Lightly brush or spray with oil if desired for extra crispiness.
- Bake for about 15-20 minutes. Check every 5 minutes after the first 10 to prevent burning. The chips should be golden around the edges and crisp to the touch.
- If some slices are curling or unevenly crispy, rotate the baking sheet or flip the chips carefully with tongs. This helps them cook evenly.
- Once the chips are crisp and browned, remove from oven. Let them cool on the sheet for 5 minutes—they will firm up as they cool.
- Transfer to a wire rack or plate. Sprinkle with a pinch of sea salt or your favorite seasoning while still warm for better flavor adherence.
- Allow the chips to rest for a few minutes. They should be crunchy and cool enough to handle without breaking. Serve immediately or store in an airtight container.
Let the chips cool on a wire rack for 5 minutes to firm up. Serve immediately or store in an airtight container for up to 2 days, though they’re best fresh.
How to Know It’s Done
- Chips are golden and crisp around edges, not soggy.
- No steam or moisture escaping when pressed lightly—indicates dryness.
- Uniform color and texture across slices, with minimal curling or burning.
Vegetable Chips
Ingredients
Equipment
Method
- Preheat your oven to 180°C (350°F). Line a baking sheet with parchment paper or a silicone mat.
- Using a mandoline or a sharp knife, thinly slice all vegetables to about 1-2mm thickness. Consistent slices ensure even crisping.
- Arrange the slices in a single layer on the prepared baking sheet, making sure they don't overlap. Lightly spray or brush with a little oil if you like extra crispness, but it's optional.
- Sprinkle the vegetable slices with a pinch of sea salt and optional smoked paprika or garlic powder for flavor.
- Bake in the oven for about 15-20 minutes, checking every 5 minutes after the first 10. Look for golden edges and crisp texture—some slices may curl or brown faster.
- If some slices are browning faster, rotate the baking sheet or flip them with tongs to promote even crisping.
- Once crispy and golden, remove the chips from the oven and transfer them to a wire rack to cool for about 5 minutes. This helps them firm up and stay crunchy.
- As they cool, listen for a satisfying crunch and observe their even, golden color.
- Serve immediately for the best crunch, or store in an airtight container at room temperature for up to 2 days. Reheat briefly if needed to restore crispness.
Notes
Pro tips for perfect vegetable chips
- Thin slices are key → Use a mandoline for consistent thickness, ensuring even crispness.
- Watch oven temperature → Keep it steady at 180°C (350°F) to prevent burning and promote even browning.
- Don’t overcrowd the pan → Give slices space to breathe; overlapping leads to soggy spots.
- Flip when halfway → Turn slices at the 10-minute mark for uniform color and crispness.
- Cool properly → Rest chips 5 minutes on a wire rack; they firm up and stay crispy longer.
- Season while warm → Sprinkle with salt or spices immediately after removing from oven for better flavor adherence.
- Adjust baking time → Keep an eye after 15 minutes; thinner slices may need less time, thicker more.
Common mistakes and how to fix them
- FORGOT to dry vegetables thoroughly → Leaves moisture, causes soggy chips.
- DUMPED seasoning onto slices → Uneven flavor; sprinkle lightly for even coverage.
- OVER-TORCHED edges → Reduce oven temp or bake shorter time.
- MISSED flipping slices midway → Chips may burn or cook unevenly.
Quick fixes and pantry swaps
- When chips are soggy, splash with a few drops of vinegar for crispness.
- If chips stick, patch with a sprinkle of sea salt and a quick bake.
- DUMPED salt or seasoning? Shake or dust evenly for balanced flavor.
- Over-torched edges? Shield with foil and lower the oven temp slightly.
- When in doubt, rescue with a 5-second reheat in a hot oven for shimmer and crunch.
Prep, store, and reheat tips
- Prepare vegetable slices ahead of time; store in airtight container in the fridge for up to 24 hours to prevent wilting and maintain crispness.
- Store baked chips in an airtight container at room temperature; they stay crisp for about 1-2 days, but are best enjoyed fresh to preserve crunch.
- Reheat chips briefly in a 150°C (300°F) oven for 3-5 minutes until warm and crispy; watch closely to avoid burning or excessive browning.
- Avoid refrigerating baked chips, as moisture can make them soggy; for optimal texture, consume within 2 days of baking.
- If chips lose some crispness, a quick re-bake at 180°C (350°F) for 2-3 minutes can revive their crunch and aroma, with a slight crackling sound confirming readiness.
Top questions about vegetable chips
1. How do I slice vegetables evenly?
Use a mandoline or a very sharp knife to get thin, even slices. Thinner slices crisp up better.
2. What’s the right baking temperature and time?
Bake at 180°C (350°F) for 15-20 minutes, checking frequently. Remove once they’re golden and crispy.
3. How do I prevent soggy chips?
Pat vegetables dry thoroughly before baking to remove excess moisture. This prevents sogginess and helps crisping.
4. What equipment do I need?
Use parchment paper or a silicone mat on your baking sheet. It helps chips release easily and keeps cleanup simple.
5. Can I bake multiple trays at once?
Don’t overcrowd the pan. Space slices apart so hot air circulates. This ensures even crisping.
6. Should I flip the vegetable slices?
Flip or rotate the slices halfway through baking. It promotes uniform color and crunch across all chips.
7. How should I finish and store the chips?
Let the chips cool on a wire rack for at least 5 minutes. They’ll firm up and stay crispy longer.
8. How long do baked vegetable chips last?
Store in an airtight container at room temperature for up to 2 days. For best crunch, eat sooner.
9. How can I revive soggy chips?
Reheat briefly at 150°C (300°F) for 3-5 minutes if they lose crunch. They’ll regain crispness as they warm.
10. What seasonings work well with vegetable chips?
Experiment with seasonings like smoked paprika, garlic powder, or herbs before baking for extra flavor.
These baked vegetable chips are a quiet reminder that simplicity can be striking. Each crispy bite carries the essence of the vegetable, with a satisfying crunch that makes snacking feel more intentional. It’s a small act of kitchen mindfulness that reconnects us with honest, unpretentious ingredients.
In a world of complicated snacks, these chips stand out because they celebrate what vegetables can do when left to their own devices. Whether you’re reaching for them during a busy afternoon or sharing with friends, they offer a wholesome crunch that’s hard to beat. Sometimes, the best snacks are the simplest ones, done well.