
Roasted chickpeas are my go-to for when I need a snack that’s both satisfying and endlessly customizable. I love experimenting with spices—paprika, cumin, even a pinch of cinnamon—to keep things interesting. It’s amazing how a simple pantry staple can turn into a flavor-packed treat with just a little heat in the oven.
What draws me in is the texture—crunchy on the outside but tender inside, and that nutty, roasted aroma that fills the kitchen. It’s a snack I can make ahead, keep in a jar, and munch on guilt-free. Plus, they’re easy enough that even a distracted cook like me can whip up a batch without much fuss.
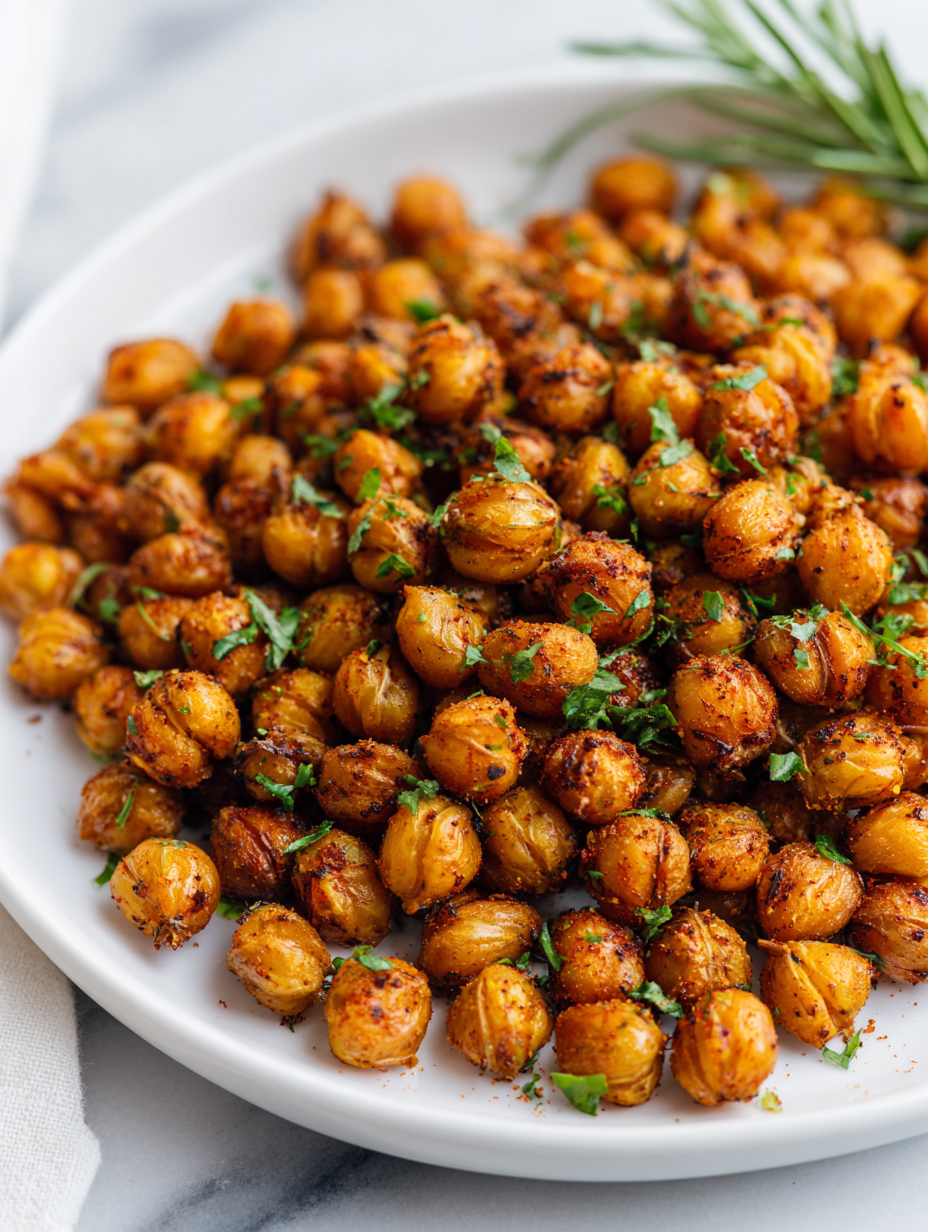
Choosing roasted chickpeas as a savory, crunchy snack that can be customized with unexpected spices and flavors, turning a simple pantry staple into a versatile, satisfying treat.
The story behind this recipe
- I stumbled upon roasted chickpeas during a busy week when I needed a quick, healthy snack that wouldn’t take over my kitchen. The first batch was an accidental mix of spices I had lying around, and it turned out to be a happy surprise—crispy, savory, and genuinely addictive. Since then, I’ve kept that idea in my back pocket, tweaking flavors based on what I’m craving or what’s in the pantry.
- There’s something satisfying about transforming humble canned chickpeas into a snack that’s both hearty and light. It’s a ritual of sorts—roasting, seasoning, tasting—and each batch feels like a tiny victory. Plus, they’re perfect for those moments when I want something crunchy without the fuss of complicated recipes.
- heading
Ingredients Breakdown
- Canned chickpeas: I prefer the firm, well-rinsed ones—they roast up crisp and hold their shape, but if you want extra crunch, try dried and cooked chickpeas for a chewier bite.
- Olive oil: I use a good splash to help spices stick and promote even roasting. For a lighter, less greasy snack, skip the oil and just season heavily before roasting.
- Salt: I always sprinkle generously—getting the seasoning right makes or breaks the flavor. To avoid over-salting, taste the seasoning mix first and adjust as needed.
- Spices: I love paprika and cumin for depth, but experimenting with chili powder or za’atar can add interesting twists. Toast spices briefly before mixing for a smoky aroma.
- Sweetener (optional): A tiny pinch of brown sugar or honey before roasting adds a caramelized crunch—just enough to enhance flavor without sweetness overpowering.
- Lemon zest or sumac: A touch of citrus or tang at the end brightens the flavor and balances the earthiness of the chickpeas. Add just before serving for maximum zing.
Spotlight on key ingredients
Canned chickpeas:
- I prefer the firm, well-rinsed ones—they roast up crisp and hold their shape, but if you want extra crunch, try dried and cooked chickpeas for a chewier bite.
- Olive oil: I use a good splash to help spices stick and promote even roasting. For a lighter, less greasy snack, skip the oil and just season heavily before roasting.
- Salt: I always sprinkle generously—getting the seasoning right makes or breaks the flavor. To avoid over-salting, taste the seasoning mix first and adjust as needed.
Spices and seasonings:
- Spices: I love paprika and cumin for depth, but experimenting with chili powder or za’atar can add interesting twists. Toast spices briefly before mixing for a smoky aroma.
- Lemon zest or sumac: A touch of citrus or tang at the end brightens the flavor and balances the earthiness of the chickpeas. Add just before serving for maximum zing.
Notes for ingredient swaps
- Dairy-Free:
- Skip any dairy-based seasonings or toppings. The chickpeas shine on their own, and you’ll avoid any milk or cheese derivatives that could alter the flavor profile or texture.
- Oil Options:
- Use avocado or sesame oil for a different aroma and richer flavor. If you want less greasy results, try a light spray of oil or even just water and spices.
- Salt Alternatives:
- Seaweed flakes or smoked salt can add a savory punch without regular salt, giving an umami depth or smoky aroma that’s unexpected.
- Sweetener Swaps:
Equipment & Tools
- Oven: To roast the chickpeas evenly at a consistent temperature.
- Baking sheet: Provides a flat surface for roasting and spreading the chickpeas in a single layer.
- Parchment paper: Prevents sticking and makes cleanup easier.
- Mixing bowl: To toss chickpeas with oil and spices thoroughly.
- Cooking spoon or spatula: To toss and spread chickpeas evenly on the baking sheet.
Step-by-step guide to roasting chickpeas
- Preheat your oven to 200°C (390°F). Line a baking sheet with parchment paper for easy cleanup.
- Drain and rinse a can of chickpeas well. Pat them dry with a clean towel or paper towel until they’re as dry as possible; moisture makes them less crispy.
- In a mixing bowl, toss the chickpeas with 1-2 tablespoons of olive oil. Make sure each one is lightly coated—this helps the spices stick and ensures even roasting.
- Add your spices: 1 teaspoon smoked paprika, ½ teaspoon cumin, a pinch of salt, and optional cayenne for heat. Toss thoroughly until evenly coated. For extra flavor, toast the spices in a dry skillet over low heat for 30 seconds before adding to the chickpeas.
- Spread the chickpeas on the prepared baking sheet in a single layer. Don’t overcrowd; give them space to crisp up.
- Roast for 25-30 minutes, shaking the pan every 10 minutes. The chickpeas are done when they are golden-brown, crunchy, and emit a toasted aroma. Keep an eye to prevent burning, especially around the edges.
- If they start to look too dark before reaching crunchiness, reduce oven temperature slightly or remove and finish cooling. For overly soft chickpeas, return to oven for a few more minutes.
- Remove from oven and let cool on the baking sheet. They will crisp up further as they cool. Taste and adjust seasoning if needed.
- Once cooled, transfer to a jar or bowl. Serve immediately or store in an airtight container for up to a week—reheat in a 180°C (350°F) oven for 5-7 minutes if needed, until crispy again.
Allow chickpeas to cool completely on the baking sheet before transferring to a jar. Serve immediately or store in an airtight container at room temperature for up to a week. Reheat in a 180°C (350°F) oven for 5-7 minutes for maximum crispness.
How to Know It’s Done
- Chickpeas are evenly golden and crisp on the outside.
- A toasted, nutty aroma fills the kitchen during roasting.
- Chickpeas crackle when you bite into them, indicating crunch.
Spiced Roasted Chickpeas
Ingredients
Equipment
Method
- Preheat your oven to 200°C (390°F) and line a baking sheet with parchment paper. Drain and rinse a can of chickpeas thoroughly, then pat them dry with a clean towel until they are very dry—this helps them become crisp during roasting.
- Transfer the dry chickpeas to a mixing bowl and drizzle with 1-2 tablespoons of olive oil. Toss them well until each chickpea is lightly coated; this creates a base for the spices and promotes even roasting.
- Add smoked paprika, cumin, a pinch of salt, and cayenne pepper if using. Toss everything together thoroughly, making sure the spices stick evenly to each chickpea. For extra flavor, toast the spices briefly in a dry skillet over low heat for 30 seconds before adding them to the chickpeas.
- Spread the seasoned chickpeas evenly on the prepared baking sheet in a single layer. Give them some space—crowding can prevent them from crisping properly.
- Roast the chickpeas in the preheated oven for 25-30 minutes, shaking the pan every 10 minutes to ensure even browning. They are ready when they are golden, crispy, and fragrant with a toasted aroma. Keep a close eye near the end to prevent burning.
- Remove the baking sheet from the oven and let the chickpeas cool completely—this step allows them to crisp up further. Once cooled, sprinkle with lemon zest or sumac for a bright, tangy finish.
- Transfer the roasted chickpeas to a jar or bowl. Serve immediately for maximum crunch, or store in an airtight container at room temperature for up to a week. Reheat briefly in the oven if they lose their crispness.
Notes
Pro tips for perfect roasted chickpeas
- Bolded mini-head: Use high heat → Ensures chickpeas become crisp quickly with a golden hue and crackling sound.
- Bolded mini-head: Dry thoroughly → Pat chickpeas completely dry to avoid steaming and promote crunch during roasting.
- Bolded mini-head: Shake midway → Toss the baking sheet every 10 minutes for even color and texture.
- Bolded mini-head: Watch for burning → Reduce oven temp or remove slightly early if edges darken too fast.
- Bolded mini-head: Toast spices → Briefly heat spices in a dry skillet to unlock smoky, aromatic notes before mixing.
- Bolded mini-head: Cool completely → Let roasted chickpeas rest on the sheet until crisp, preventing sogginess in storage.
- Bolded mini-head: Season after roasting → Add delicate herbs or citrus zest once out of the oven for fresh brightness.
Common mistakes and how to fix them
- TOO MUCH OIL: Use less oil; chickpeas should be lightly coated, not swimming in it.
- OVERCOOKED: Watch for dark edges; remove early if they start to burn or smell burnt.
- UNDER-DRIED CHICKPEAS: Pat dry thoroughly; moisture prevents crispness and causes sogginess.
- INSUFFICIENT SPICE: Taste seasoning before roasting; adjust to ensure bold flavor after cooking.
Fast fixes for roasted chickpeas
- If chickpeas are soggy, splash them with a little more oil and roast 5 minutes longer.
- When spices burn, patch with a sprinkle of fresh spice and reduce oven temperature.
- Splash a few drops of lemon juice if the chickpeas lack brightness and flavor.
- DUMPED too much oil? Pat with a paper towel before re-roasting for crunch.
- When in doubt, pantry swap: use toasted sesame seeds instead of spice mix for a nutty twist.
Prep, store, and reheat tips
- Prepping chickpeas: Rinse and thoroughly dry canned chickpeas the night before to ensure maximum crispness during roasting.
- Storage: Keep roasted chickpeas in an airtight container at room temperature for up to a week. They stay crisp and flavorful if kept dry.
- Shelf life: For best texture, consume within 5-7 days. After that, they may lose some crunch and become softer.
- Reheating: To revive crispness, reheat in a 180°C (350°F) oven for 5-7 minutes, watching for crackling sounds and golden color.
- Sensory note: The smell will become more toasted and aromatic, with a satisfying crunch when reheated properly.
Top questions about roasted chickpeas
1. How do I pick the best chickpeas for roasting?
Look for chickpeas that are firm, well-rinsed, and dry before roasting. They’ll turn crispy and hold together well.
2. Can I use a different oil instead of olive oil?
Use a high-quality olive oil for flavor and even coating. Too little oil won’t help spices stick, too much can make them greasy.
3. How do I know when roasted chickpeas are done?
Bake until they’re golden-brown and crackle when you bite into them—usually about 25-30 minutes at 200°C (390°F).
4. Can I add spices after roasting?
Yes, you can season them beforehand or after roasting. Seasoning after keeps spices fresh and vibrant.
5. How long do roasted chickpeas stay fresh?
Store in an airtight container at room temperature for up to a week. They stay crispy if kept dry.
6. How do I re-crisp leftover chickpeas?
Reheat in a 180°C (350°F) oven for 5-7 minutes until they crackle again. Check frequently to avoid burning.
7. What if my chickpeas are too salty?
Adjust seasoning based on your taste. Too salty? Rinse lightly and re-roast briefly to balance flavors.
8. What spices work best for flavor?
Use smoked paprika or chili powder for a smoky or spicy twist. Toast spices briefly for deeper aroma.
9. Can I use dried chickpeas instead of canned?
Yes, dried chickpeas can be cooked until tender, then roasted for an even crunch and chewier bite.
10. When should I add citrus or herbs?
Adding a pinch of lemon zest or sumac at the end brightens the flavor. It’s all about balancing earthiness with zing.
These roasted chickpeas are a reminder that simple ingredients can turn into something unexpectedly satisfying. They’re perfect for snacking on during busy days or sharing with friends who appreciate a crunchy, flavorful bite. Nothing beats the smell of them roasting—warm, nutty, with a hint of spice that lingers in the air.
In a world full of quick fixes, this recipe offers a straightforward way to enjoy a homemade, guilt-free treat. Plus, it’s flexible enough to adapt with whatever spices or seasonings you have on hand. Hope you find as much comfort in making and munching these as I do.