Roasted garlic has a way of mellowing out and sweetening, transforming from sharp and pungent to irresistibly fragrant and almost jammy. When I first discovered that roasting garlic alongside chickpeas, I realized it wasn’t just about adding flavor; it’s about creating a layered, caramelized depth that makes every bite feel richer and more satisfying. This recipe is about capturing that slow, fragrant garlic infusion and making it the star of a crispy, satisfying bite.
There’s something honest about roasting garlic in its own skin—no fuss, just time and heat doing their magic. It’s a humble process that turns simple chickpeas into a deeply savory snack, perfect for munching straight from the oven or tossing into salads and bowls. I love how the garlic’s aroma fills the kitchen, making even the simplest snack feel a little special, a little more intentional.
Focusing on how roasting garlic transforms its sweetness and aroma, I discovered that it beautifully balances the earthiness of chickpeas, turning a simple snack into a deeply savory, almost caramelized treat. This recipe is about capturing that slow, fragrant garlic infusion and making it the star of a crispy, satisfying bite.
The story behind this recipe
- I remember the first time I roasted garlic just to see what all the fuss was about. The kitchen filled with that warm, sweet aroma, and I knew I’d stumbled on something special. When I tossed it with some crispy chickpeas, the combination became an addiction—simple, honest, and surprisingly transformative. It’s a reminder that good things happen slowly, with patience and a bit of heat.
- This recipe grew out of a lazy afternoon craving something crunchy and savory, but with a twist—garlic so mellow and fragrant it almost melts into the chickpeas. I started roasting garlic in batches, just to keep that rich, roasted flavor handy. Now, it’s the kind of snack I turn to when I want comfort without fuss, something that smells like home in every crackling bite.
- heading: ‘The story behind this recipe’
Ingredient breakdown
- Garlic: I love how roasting transforms garlic into a sweet, mellow paste with a smoky aroma—use plenty for depth, or reduce if you prefer a softer garlic punch.
- Chickpeas: I prefer canned, rinsed, and patted dry; they get crispier in the oven, and their nutty flavor really shines when roasted until golden.
- Olive oil: I drench the chickpeas in good quality oil, which helps with crispy texture and brings out the roasted garlic’s smoky sweetness—use enough to coat evenly.
- Salt: I sprinkle generously—think of it as a flavor amplifier—though if you’re watching sodium, a lighter hand still makes a tasty snack.
- Optional spices: I sometimes toss in smoked paprika or cumin for an extra layer of warmth—start with small amounts, then adjust to your taste.
- Lemon juice: A squeeze after roasting brightens everything up with a fresh, citrusy spark—don’t skip it if you want that lively finish.
- Fresh herbs: A sprinkle of parsley or cilantro just before serving adds a pop of color and freshness—use sparingly, as they can wilt quickly.
Spotlight on key ingredients
Garlic:
- I love how roasting transforms garlic into a sweet, mellow paste with a smoky aroma—use plenty for depth, or reduce if you prefer a softer garlic punch.
- Chickpeas: I prefer canned, rinsed, and patted dry; they get crispier in the oven, and their nutty flavor really shines when roasted until golden.
Chickpeas:
- Olive oil: I drench the chickpeas in good quality oil, which helps with crispy texture and brings out the roasted garlic’s smoky sweetness—use enough to coat evenly.
- Salt: I sprinkle generously—think of it as a flavor amplifier—though if you’re watching sodium, a lighter hand still makes a tasty snack.
- Lemon juice: A squeeze after roasting brightens everything up with a fresh, citrusy spark—don’t skip it if you want that lively finish.
Notes for ingredient swaps
- Dairy-Free: Skip butter or yogurt; the chickpeas stay crispy and flavorful, but miss the creamy richness.
- Oil Variations: Use avocado or sesame oil for different smoky or nutty notes—each adds a unique aroma.
- Salt: Kosher salt has a coarser crunch; sea salt flakes add a subtle briny touch on top.
- Spice Boost: Swap smoked paprika for chili powder or cumin—adjust heat and depth without losing that smoky essence.
- Lemon Juice: Lime works perfectly if you prefer a sharper citrus zing or want a slightly sweeter note.
- Herbs: Fresh thyme or basil can replace parsley for a different, fragrant finish—add just before serving.
- Garlic: Use roasted shallots or scallions for a milder, sweeter alternative—less pungent but still savory.
Equipment & Tools
- Oven: To roast garlic and chickpeas evenly.
- Baking sheet: To hold the chickpeas for roasting.
- Foil or oven-safe dish: To wrap and roast the garlic.
- Knife: To cut the top off the garlic head.
- Mixing bowl: To toss chickpeas with oil and spices.
- Fork: To mash roasted garlic.
- Parchment paper: To prevent sticking and make cleanup easier.
Roasted Garlic Chickpeas Guide
- Preheat your oven to 200°C (400°F). Gather a baking sheet, a small knife, and a mixing bowl.
- Take a whole head of garlic. Slice off the top to expose the cloves. Drizzle with 1 teaspoon olive oil. Wrap in foil or place in a small oven-safe dish.
- Roast garlic in the oven for 35-40 minutes until soft, fragrant, and golden brown. Check after 30 minutes; it should be jammy and sweet-smelling.
- While garlic roasts, drain and rinse 1 can (15 oz) of chickpeas. Pat dry thoroughly with a clean towel or paper towels.
- In a mixing bowl, toss chickpeas with 2 tablespoons olive oil, 1 teaspoon salt, and optional spices like smoked paprika or cumin.
- Once garlic is cool enough to handle, squeeze out the roasted cloves into a small bowl. Mash with a fork until smooth, then mix into the chickpeas.
- Spread chickpeas evenly on a baking sheet lined with parchment paper. Roast for 25-30 minutes, stirring halfway through, until crispy and golden.
- During roasting, listen for a crackling sound—that’s the chickpeas crisping up. Smell should be nutty and smoky, with hints of garlic.
- Remove from oven and let sit for 5 minutes to firm up. Taste and adjust salt or spices if needed. Toss with a squeeze of lemon for brightness.
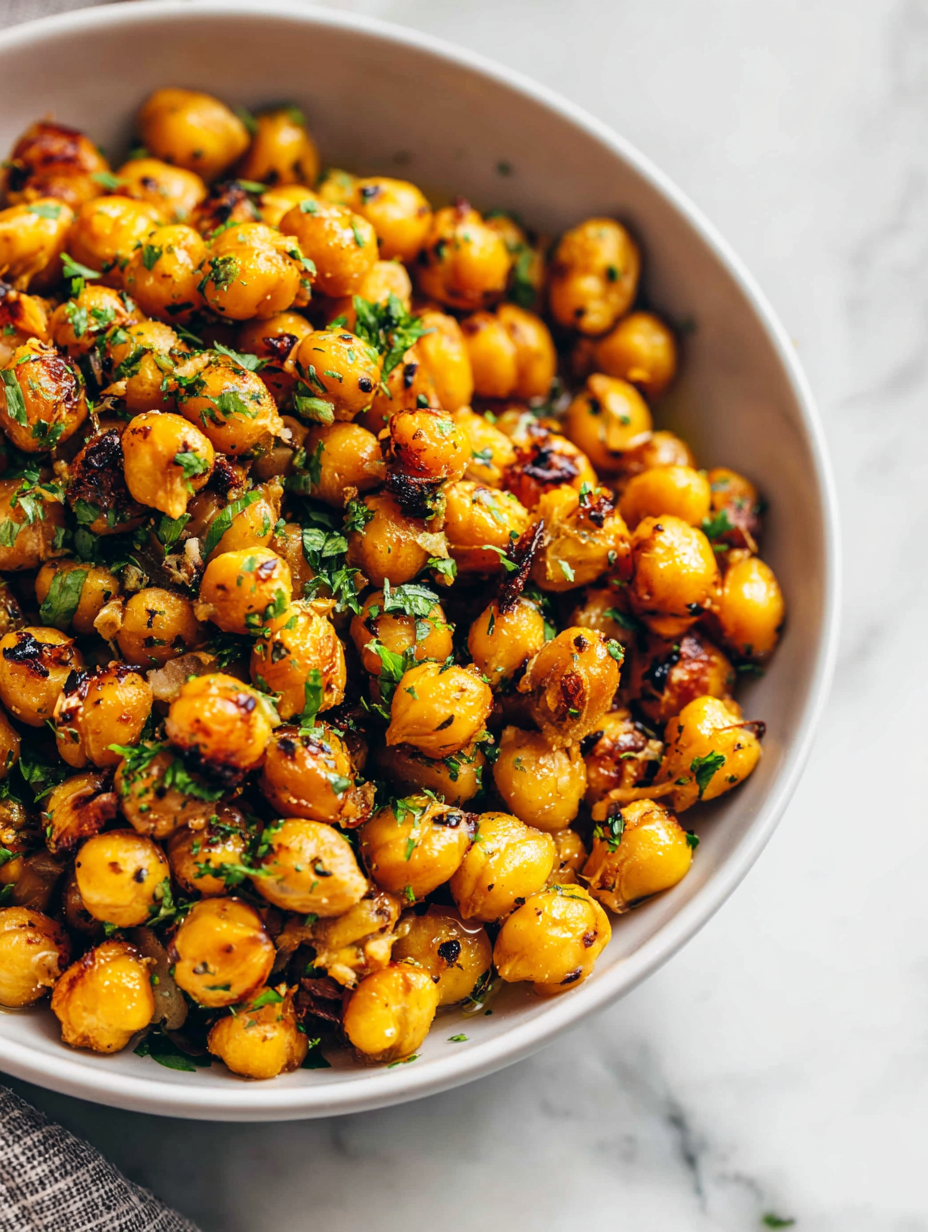
- Plate the chickpeas in a bowl or on a platter. Garnish with fresh herbs if using. Serve warm or at room temperature.
Let the chickpeas rest for 5 minutes off the oven to firm up. Finish with a squeeze of lemon and a sprinkle of fresh herbs if desired. Serve warm or at room temperature, enjoying the contrast of crispy exterior and tender, aromatic garlic inside.
How to Know It’s Done
- Chickpeas are crispy and golden, with a firm texture when stirred.
- Garlic is soft, fragrant, and caramelized, not burnt or bitter.
- The mixture smells smoky, nutty, with a hint of roasted garlic aroma.
Roasted Garlic Chickpeas
Ingredients
Equipment
Method
- Preheat your oven to 200°C (400°F). Take a whole head of garlic, slice off the top to expose the cloves, place it on a piece of foil or in an oven-safe dish, drizzle with 1 teaspoon olive oil, and wrap or cover. Roast for 35-40 minutes until the garlic is soft, fragrant, and jammy.
- While the garlic roasts, rinse and thoroughly dry the canned chickpeas using a clean towel. In a mixing bowl, toss the chickpeas with 1 tablespoon olive oil, 1 teaspoon salt, and optional smoked paprika, ensuring they are evenly coated.
- Once the garlic is soft and fragrant, carefully squeeze out the roasted cloves into a small bowl. Mash the garlic with a fork until it becomes a smooth, jammy paste.
- Add the mashed garlic to the bowl with chickpeas and toss to distribute evenly, infusing the chickpeas with rich, roasted garlic flavor.
- Spread the coated chickpeas evenly on a parchment-lined baking sheet. Roast in the oven for 25-30 minutes, stirring halfway through, until they are golden, crispy, and fragrant.
- Once crispy, remove from the oven and squeeze fresh lemon juice over the chickpeas for brightness. Toss gently to coat.
- Garnish with freshly chopped herbs like parsley or cilantro for a fresh, colorful touch. Serve warm or at room temperature for a satisfying, aromatic snack.
Notes
Tips for perfect roasted garlic chickpeas
- Bolded mini-head: Use a generous amount of oil to ensure crispiness and help the garlic infuse into the chickpeas.
- Bolded mini-head: Roast garlic until soft, jammy, and fragrant—don’t rush the caramelization process.
- Bolded mini-head: Stir chickpeas halfway through roasting to promote even crisping and prevent burning.
- Bolded mini-head: Squeeze out roasted garlic when cool enough to handle, then mash thoroughly for full flavor distribution.
- Bolded mini-head: Keep an ear out for crackling sounds—it’s your cue that the chickpeas are crisping perfectly.
Common mistakes and how to fix them
- FORGOT to preheat oven → Ensure oven reaches 200°C (400°F) before roasting.
- DUMPED garlic too early → Roast until the garlic is jammy, golden, and fragrant, about 35-40 mins.
- OVER-TORCHED chickpeas → Remove when crispy and golden, not burnt or dark brown.
- MISSED crushing garlic → Squeeze roasted garlic out of skins and mash until smooth for flavor.
Quick fixes and pantry swaps
- When garlic burns, splash a little water to cool it down quickly.
- If chickpeas are soggy, roast longer or increase oven temperature slightly.
- Dumped chickpeas before they crisp? Return to oven and roast 5-10 minutes more.
- Over-torched garlic? Dole out only the soft, caramelized cloves and discard the burnt bits.
- Shield fragile chickpeas with a parchment layer if they crackle too loudly or burn.
Prep, store, and reheat tips
- You can roast garlic and cook chickpeas a day ahead. Store separately in airtight containers in the fridge for up to 3 days. The aroma of roasted garlic mellowing overnight is something I look forward to.
- Refrigerated chickpeas will stay crisp for about 2 days. Reheat in a hot oven (around 180°C/350°F) for 5-7 minutes until crackling resumes and they smell nutty again.
- For longer storage, freeze roasted garlic in small portions—about 2-3 months. Thaw at room temperature, then re-crisp in the oven for best texture.
- The flavors deepen overnight, so if you want a more intense garlic and smoky taste, make them a day in advance. Just keep an eye on moisture; reheat until crispy and fragrant.
Top questions about roasted garlic chickpeas
1. How does roasting garlic change its flavor?
Roasted garlic mellows out to a sweet, jammy paste with a smoky aroma, adding depth and richness. Use plenty for a bold flavor or less if you prefer a milder garlic punch.
2. Can I use dried chickpeas instead of canned?
Canned chickpeas work best because they’re already cooked, saving time and resulting in crispier, more evenly roasted chickpeas. Rinse and dry well to avoid sogginess.
3. How much oil do I need for crispy chickpeas?
Use a good quality olive oil to coat the chickpeas evenly, which helps them crisp up and enhances the smoky garlic flavor. Less oil can make them less crispy.
4. How do I know when the garlic is roasted enough?
Roast garlic until soft and jammy, about 35-40 minutes at 200°C (400°F). It should smell sweet, with a golden hue, not burnt or bitter.
5. Should I add lemon juice before or after roasting?
Adding a squeeze of lemon brightens the overall flavor, balancing the smoky garlic and crispy chickpeas with a fresh, tangy note.
6. Can I customize the spices in this recipe?
Yes, spices like smoked paprika or cumin add warmth and depth. Toss them with the chickpeas before roasting for an extra layer of flavor.
7. How long can I store roasted garlic chickpeas?
Store cooled roasted garlic chickpeas in an airtight container in the fridge for up to 3 days. Reheat in a hot oven for crispiness and aroma revival.
8. What if the garlic turns bitter?
Over-roasting garlic can lead to bitterness. Remove from the oven when fragrant, soft, and golden, not overly dark or burnt.
9. My chickpeas are soft, what went wrong?
If chickpeas are soggy, return them to the oven and roast for an additional 5-10 minutes until crispy and golden.
10. How do I fix burnt garlic or soggy chickpeas?
For a quicker fix, splash a bit of water on burnt garlic to cool it, or toss overcooked chickpeas back into the oven for a few minutes.
This dish really highlights how a simple technique like roasting garlic can elevate a humble snack into something deeply flavorful. The aroma of caramelized garlic and crispy chickpeas filling the kitchen makes every batch feel like a small celebration.
In the end, it’s about those small moments—crunching into a warm, fragrant bite or sharing a handful with friends—that make cooking worthwhile. Sometimes, the simplest ingredients, treated with patience and care, turn into your favorite little indulgence. It’s a reminder that good food is often about honest, straightforward magic.