
Baked potato chips take me back to those lazy weekends when I’d snack on whatever was handy, usually stored in a crinkled bag. There’s something about the simple act of slicing a potato thin, watching it crisp up in the oven, that feels oddly grounding. Plus, they’re healthier than fried, so I can indulge without that guilt creeping in.
This recipe isn’t about perfect uniformity or crunch perfection—it’s about that rustic charm, the slightly uneven edges, the satisfying crackle when you bite in. You can tweak seasonings endlessly, from smoky paprika to fresh herbs, making each batch a little different. It’s a reminder that good snacks don’t need to be complicated—just honest, homemade, and a little bit nostalgic.
Focusing on the nostalgic comfort of homemade baked potato chips, highlighting how they evoke childhood memories of weekend snacks and lazy afternoons, yet offering a simple, healthier twist that you can customize with your favorite seasonings.
The story behind this recipe
- Growing up, I remember rummaging through my grandma’s kitchen, the aroma of roasted potatoes wafting through the air. One lazy afternoon, she handed me a sharp knife and a bag of potatoes, saying, ‘Let’s make something special.’ Watching those thin slices turn golden in the oven sparked a little spark of joy that stuck with me. Now, I keep coming back to this recipe whenever I want a snack that’s simple, honest, and a touch nostalgic.
- It’s funny how a humble potato can evoke so many memories—those lazy summer afternoons and the quiet moments of carving out time to make something from scratch. I love how these baked chips, with their imperfect edges and smoky aroma, remind me that sometimes the best snacks are the ones you make yourself, with a little patience and a lot of love.
- heading: ‘The story behind this recipe’
Ingredient breakdown
- Potatoes: I prefer using starchy Russets because they crisp up beautifully; you might try Yukon Gold for a slightly richer flavor and softer bite.
- Oil: I use a light spray of neutral oil—canola or vegetable—but a little bit of avocado oil gives a subtle nutty aroma and helps with crispness.
- Salt: Just a pinch for seasoning, but I love finishing with flaky sea salt for that satisfying crunch and burst of salty flavor.
- Seasonings: Paprika, garlic powder, or herbs can transform these chips; I like adding smoked paprika for a smoky, vibrant kick.
- Optional extras: A sprinkle of parmesan or a dash of cayenne can spice things up, but keep it light so the potato flavor still shines through.
- Vinegar or lemon juice: A tiny splash before baking adds a zing that brightens the overall taste, making each bite lively and fresh.
- Water: Rinsing and thoroughly drying the sliced potatoes is key — that extra step keeps the chips from steaming and helps them crisp up.
Spotlight on Key Ingredients
Potatoes:
- I prefer starchy Russets—they crisp up beautifully and hold their shape well. Yukon Golds offer a richer flavor but tend to be softer, so they’re better if you want a slightly different texture.
- Oil: I use a light spray of neutral oil like canola or vegetable for even coating. A splash of avocado oil adds a subtle nutty aroma and helps with crispness, but keep it light to avoid greasy chips.
Seasonings:
- Salt: Just a pinch for seasoning, but flaky sea salt at the end gives a satisfying crunch and a burst of salty flavor. It’s the finishing touch that elevates the simple taste.
- Vinegar or Lemon Juice: A tiny splash before baking adds a lively brightness, making each bite feel fresh and lively. It’s a small step that makes a big difference in flavor profile.
Notes for ingredient swaps
- Potatoes: I prefer Russets for maximum crispness; Yukon Golds are softer and slightly sweeter, skip if you want crunch.
- Oil: Use a neutral oil like canola or vegetable; olive oil adds flavor but can burn faster, so use sparingly.
- Salt: Regular table salt works fine, but flaky sea salt gives a lovely crunch and burst of flavor at the finish.
- Seasonings: Smoked paprika adds depth, but garlic powder, onion powder, or herbs can customize your chips easily.
- Vinegar or lemon juice: A splash brightens flavors, but skip if you prefer a milder, more traditional chip taste.
- Water: Rinsing starch off is key—skip this step to risk soggy chips, which won’t crisp well after baking.
- Optional extras: Parmesan or cayenne can spice things up, but keep amounts modest to avoid overpowering the potato flavor.
Equipment & Tools
- Mandoline: To slice potatoes evenly and thinly for crispness.
- Baking sheet with parchment: Provides a non-stick surface for baking; easy cleanup.
- Cooling rack: Allows air to circulate and keeps chips crisp after baking.
- Spatula: For flipping and transferring chips with care.
- Bowl: For tossing slices with oil and seasonings.
Step-by-step guide to baked potato chips
- Equipment & Tools: Gather a mandoline slicer for thin, even slices; a baking sheet lined with parchment; a small bowl for seasoning; a spatula for flipping; and a cooling rack.
- Preheat your oven to 200°C (390°F). Make sure the rack is in the middle position.
- Wash and peel your potatoes if desired. Slice them as thin as possible, about 1/16 inch, using the mandoline.
- Rinse the sliced potatoes in cold water to remove excess starch. Drain and pat very dry with a clean towel or paper towels.
- Toss the potato slices in a light spray of neutral oil, just enough to coat each piece. Season with a pinch of salt and optional spices if you like.
- Arrange the slices in a single layer on the prepared baking sheet. Don’t overcrowd; give each chip space to crisp.
- Bake for 15-20 minutes. Check around 12 minutes; they should start to turn golden at the edges.
- Flip the chips with a spatula, then continue baking until crispy and golden brown, about 5 more minutes. Watch carefully to prevent burning.
- Once perfectly crisp, transfer the chips to a cooling rack and let rest 5 minutes. They’ll firm up as they cool.
- Serve immediately or store in an airtight container for up to 2 days. Reheat in a 180°C (355°F) oven for 5 minutes to revive crispness.
Let the chips rest on a cooling rack for 5 minutes before serving to let them firm up. Serve immediately for best crunch, or store in an airtight container for up to 2 days. Reheat in a 180°C (355°F) oven for 5 minutes to restore crispness.
How to Know It’s Done
- Color: Chips should be golden brown around edges.
- Texture: They should be crisp and snap when bitten.
- Appearance: No soggy or uneven spots; uniform thinness helps.
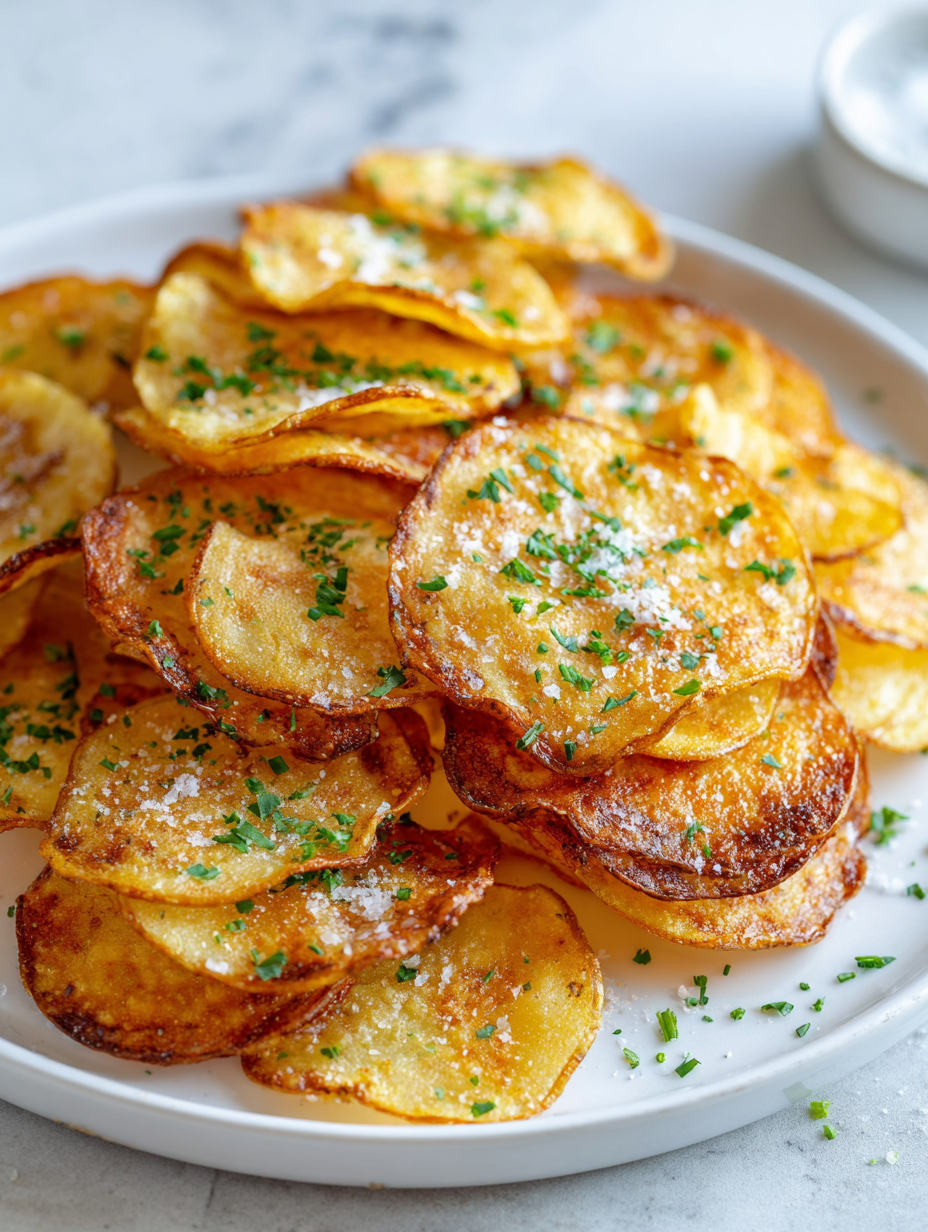
Homemade Baked Potato Chips
Ingredients
Equipment
Method
- Start by washing and peeling the potatoes if you prefer. Using a mandoline, slice the potatoes as thin as possible, about 1/16 inch, to ensure they crisp up nicely.
- Rinse the potato slices in cold water to remove excess starch. Drain well and pat completely dry with a clean towel or paper towels to prevent steaming and help them crisp in the oven.
- Transfer the dry slices to a bowl and lightly spray or toss with neutral oil, just enough to coat each piece evenly. Sprinkle with a pinch of salt, smoked paprika, and a splash of lemon juice or vinegar if using, then toss gently to distribute the seasonings.
- Arrange the seasoned slices in a single layer on a parchment-lined baking sheet, giving each chip space to breathe and crisp up without overlapping.
- Preheat your oven to 200°C (390°F). Place the baking sheet in the middle rack and bake for 15-20 minutes. Keep an eye on them after 12 minutes, as they will start to turn golden at the edges.
- After about 12 minutes, check the chips and gently flip them with a spatula for even baking. Continue baking until they are crisp and golden brown, about 3-5 minutes more, watching carefully to avoid burning.
- Remove the baking sheet from the oven and transfer the chips to a cooling rack to rest for 5 minutes. This allows them to firm up and achieve maximum crispness.
- Once cooled, taste and sprinkle with additional flaky sea salt if desired. Serve immediately for the best crunch, or store in an airtight container for up to 2 days. To refresh their crispness, reheat in a 180°C (355°F) oven for 5 minutes.
Notes
Pro tips for perfect baked chips
- Thin slices matter → Use a mandoline for uniform, crispy chips every time.
- Dry thoroughly → Pat slices dry to prevent steaming and ensure crispness.
- Light oil coating → Spray or toss lightly; too much makes chips greasy.
- Watch the color → Remove chips when edges turn golden, not dark brown.
- Flip midway → Turn slices after 10 minutes for even cooking and uniform crunch.
- Cool on a rack → Let chips rest on a wire rack for maximum crispness.
- Season immediately → Sprinkle with flaky salt right after baking for best flavor.
Common mistakes and how to fix them
- FORGOT to dry potatoes thoroughly → Chips may steam, dry slices well before baking.
- DUMPED excess oil → Use minimal spray for crisp, not greasy chips.
- OVER-TORCHED chips → Remove when edges are golden, not dark brown, to avoid bitterness.
- USED cold oven to bake → Preheat oven fully to ensure even crisping and proper texture.
Quick Fixes for Baked Chips
- When chips are soggy, splash them with a bit more oil and bake 3-5 minutes longer.
- If chips stick together, patch with a gentle tap and separate before final bake.
- DUMPED too much salt? Rinse chips quickly, dry thoroughly, then season lightly again.
- Over-torched chips? Shield with foil and reduce oven temperature for the next batch.
- Splash vinegar or lemon juice over slices before baking to shimmer with brightness.
Prep, store, and reheat tips
- You can slice the potatoes a day ahead, store them in water in the fridge to prevent browning, and dry thoroughly before baking to ensure crispness.
- Store baked chips in an airtight container at room temperature for up to 2 days; they stay crispy for a day, then may soften slightly.
- Reheat chips in a 180°C (355°F) oven for 5 minutes; you’ll hear a crackle as they crisp back up, and they’ll regain some of their original snap.
- Avoid refrigerating baked chips for long periods, as moisture can make them soggy; best enjoyed fresh or reheated quickly.
Top questions about baked potato chips
1. How thin should I slice the potatoes?
Use a mandoline for thin, uniform slices that crisp evenly. Thinner slices bake faster and crunchier.
2. Should I rinse the potato slices before baking?
Soak the slices in cold water for 30 minutes, then dry thoroughly. It removes excess starch and prevents sogginess.
3. How much oil do I need?
Lightly spray or toss with a small amount of oil—just enough to coat. Too much makes them greasy, too little impacts crispness.
4. What oven temperature and time work best?
Bake at 200°C (390°F) for 15-20 minutes. Check around 12 minutes; they should be golden at the edges.
5. Should I flip the chips during baking?
Flip the chips after 10 minutes to promote even crisping. Keep a close eye to prevent burning.
6. Do I need to cool the chips after baking?
Cool on a wire rack for 5 minutes. This helps them stay crisp and prevents sogginess.
7. How should I store and reheat leftover chips?
Store in an airtight container at room temperature for up to 2 days. Reheat in a 180°C (355°F) oven for 5 minutes to restore crunch.
8. Which potatoes are best for baking chips?
Use Russet potatoes for maximum crunch. Yukon Golds are softer and richer, better if you prefer a different texture.
9. Can I flavor the chips with seasonings before baking?
Add a splash of lemon juice or vinegar before baking for a bright, lively flavor contrast.
10. What should I do if my chips burn or cook unevenly?
If chips turn dark or burn, remove from oven immediately. For uneven baking, rotate the pan halfway through.
Making these baked potato chips is my little act of nostalgia and honesty. They’re perfect for that craving that hits in the late afternoon or when I need a simple, satisfying snack that I can tweak endlessly. There’s something grounding about slicing a potato and seeing it turn golden in the oven, a small reminder that good things come from straightforward effort.
Whenever I make a batch, I’m reminded that the best snacks are often the simplest—rustic, imperfect, and full of flavor. These chips aren’t just about crunch; they’re about reclaiming that childhood joy of homemade treats, with a touch of seasonal flair or a sprinkle of your favorite spice.