
Vegetable tikkis have always been more than just a snack for me; they’re a portal to childhood memories of busy street corners and the aroma of spices wafting through the air. It’s that perfect blend of crispy exterior and tender, flavorful interior that draws me back, every single time. Making them at home feels like I’m holding onto a piece of that street food magic, but with a personal touch.
What I love about this recipe is how forgiving it is—an opportunity to get creative with whatever vegetables you’ve got lying around. Sometimes, I toss in a handful of spinach or grated zucchini just to shake things up, but the core remains simple: fresh, earthy, and slightly smoky from the pan. It’s a satisfying process, turning humble ingredients into something that feels like a small celebration.
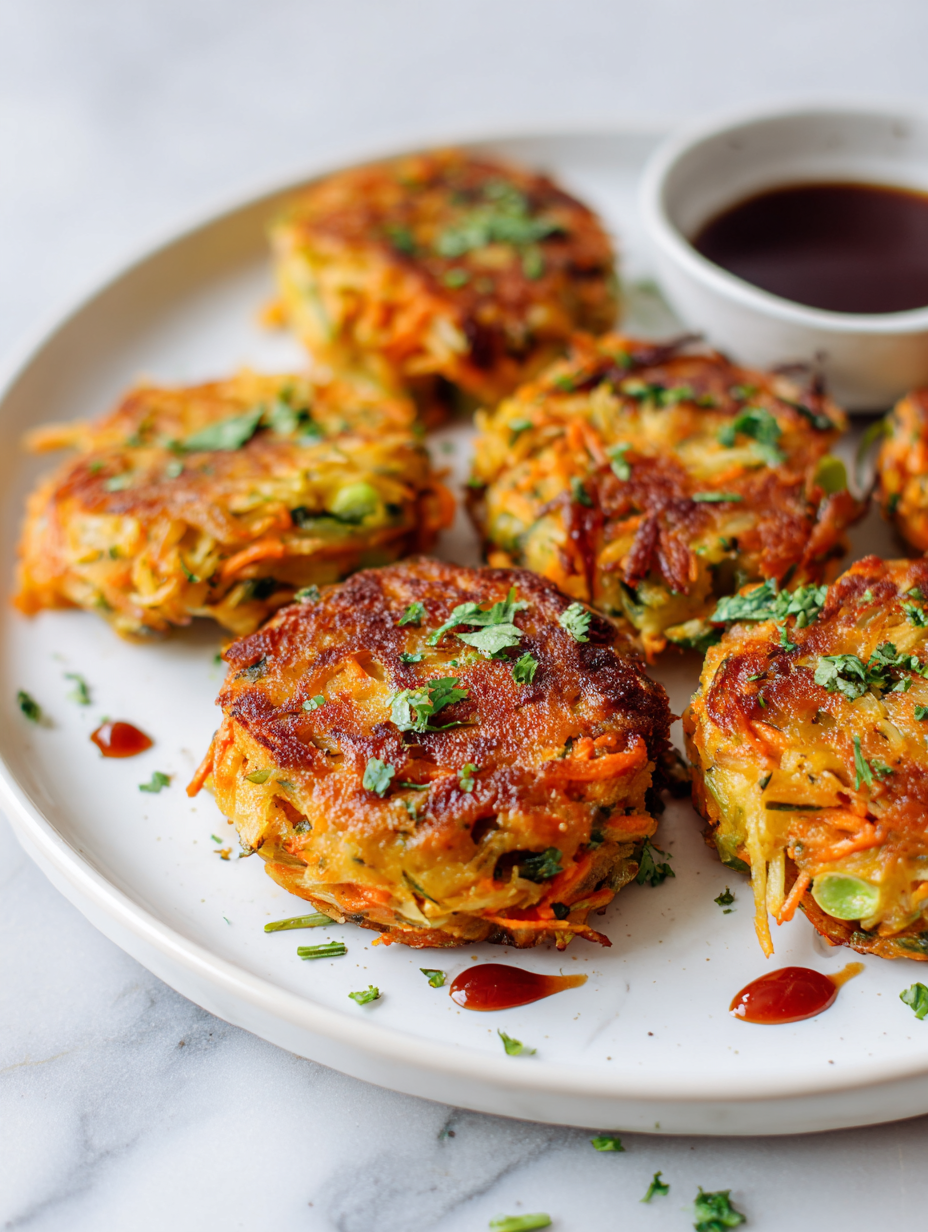
Focusing on the nostalgic comfort of vegetable tikkis, this recipe is a reminder of street food stalls and home kitchens blending flavors and memories in every bite.
Street Food Nostalgia in Every Bite
- I remember sneaking bites of these tikkis while they were still warm, the crisp exterior giving way to a burst of spicy, tender veggie goodness.
- Cooking these reminds me of lazy weekend afternoons in my childhood kitchen, where experimenting with spices was part of the fun.
- There’s a chaotic joy in flipping these tikkis—the satisfying crackle and the smell of toasted cumin always make me smile.
- Sometimes, I add a splash of lemon right before serving, and it brightens the whole plate unexpectedly.
- Sharing these with friends feels like passing on a little piece of nostalgic comfort, especially when they ask for the recipe.
The story behind this recipe
- This recipe was born out of a chaotic weekend in my tiny kitchen, where I had a bunch of leftover vegetables and a craving for something crispy and warm. I wanted something that felt like street food but with a personal twist, a way to turn simple ingredients into a comforting snack. The process of mixing, shaping, and frying these tikkis always pulls me back to my roots — those bustling stalls and quiet moments of experimentation.
- I remember the first time I got the seasoning just right, that perfect balance of spice and earthiness, and how the aroma filled the whole room. Since then, these tikkis have become my go-to for impromptu gatherings or a quick craving fix. They’re imperfect, somewhat rustic, but honest — a little chaos in each crispy bite.
- heading
- story_type
Tikkis’ Cultural and Historical Roots
- Vegetable tikkis have roots in Indian street food, where vendors serve these crispy snacks from bustling carts.
- Traditionally, they originated as a way to use leftover vegetables, turning humble ingredients into flavorful bites.
- The concept of pan-frying vegetable mixes dates back centuries, blending local spices and seasonal produce.
- In many regions, tikkis are a festive street staple, often enjoyed during fairs and family gatherings.
Key ingredients and tips
- Potatoes: I use starchy, fluffy potatoes for a tender interior that holds together well. Swap with sweet potatoes if you prefer a sweeter, denser bite.
- Mixed Vegetables: Carrots, peas, and beans add color and texture—think of them as a rainbow in every bite. Feel free to toss in leftover cooked veggies for extra flavor.
- Spices: Cumin, coriander, and garam masala bring warmth and depth. Adjust the amounts to suit your spice tolerance—less heat, more aroma.
- Binding Agents: Breadcrumbs and a dash of gram flour help everything stick. If too dry, a splash of water or yogurt can bring back that moist, tender feel.
- Fresh Green Herbs: Cilantro and mint brighten up the flavor with a fresh, herbal zing. You can omit or replace with parsley for a milder note.
- Oil for Frying: Use a neutral oil like sunflower or canola—hot enough to crisp without burning. Watch the temperature; too hot and the tikkis burn outside, raw inside.
- Lemon Juice: Brightens the whole dish just before serving, adding a zesty punch that cuts through the spices with a shimmer of freshness.
Spotlight on key ingredients
Potatoes:
- I choose starchy, fluffy potatoes for a tender, cohesive texture. Swap with sweet potatoes if you prefer a sweeter, denser bite.
- Potatoes tend to absorb flavors well and form a nice crust when fried. Watch the moisture level to prevent sogginess.
Mixed Vegetables:
- Carrots, peas, and beans add vibrant color and a crunch that contrasts beautifully with the crispy exterior.
- They also release a subtle sweetness and moisture during cooking that enhances the overall flavor. Feel free to use leftover cooked veg for speed.
Notes for ingredient swaps
- Potatoes: I prefer starchy, fluffy potatoes for a tender interior. Swap with sweet potatoes for a denser, slightly sweeter bite.
- Mixed Vegetables: Carrots, peas, and beans add color and texture—think of them as a rainbow in every bite. Feel free to use leftover cooked veggies to save time.
- Spices: Cumin, coriander, garam masala bring warmth and depth. Cut back if you want milder flavor, or boost for a spicier kick.
- Binding Agents: Breadcrumbs and gram flour help hold everything together. If mixture feels too dry, add a splash of water or yogurt; if too wet, sprinkle more breadcrumbs.
- Fresh Herbs: Cilantro and mint brighten up the flavor with herbal freshness. Parsley can be a milder alternative, or omit for a more neutral taste.
- Oil for Frying: Use a neutral oil like sunflower or canola. Make sure it’s hot enough—about 160°C/320°F—to get crispy without burning.
- Lemon Juice: Brightens and sharpens the flavor just before serving. If unavailable, a dash of vinegar can add a similar zing.
Equipment & Tools
- Large skillet or frying pan: For frying the tikkis evenly and comfortably.
- Mixing bowls: To combine and shape the ingredients.
- Grater or food processor: To prepare vegetables quickly and evenly.
- Spatula or tongs: To flip and handle hot tikkis safely.
- Paper towels: To drain excess oil after frying.
Step-by-step guide to vegetable tikkis
- Gather all ingredients: potatoes, mixed vegetables, spices, breadcrumbs, gram flour, herbs, oil, lemon. Prep the vegetables by grating or finely chopping them. Boil potatoes until just tender, about 10 minutes at 100°C/212°F, then mash well.
- In a large mixing bowl, combine mashed potatoes with grated vegetables, spices, chopped herbs, breadcrumbs, and gram flour. Mix thoroughly until everything is well incorporated and the mixture holds together when shaped. If too dry, add a splash of water or yogurt; if too wet, sprinkle in more breadcrumbs.
- Divide the mixture into equal portions, roughly the size of a golf ball. Flatten each portion into a patty about 1.5 cm thick. Use your hands or a scoop for even sizing.
- Heat a generous amount of neutral oil in a large skillet over medium heat, about 160°C/320°F. To test if the oil is hot enough, drop in a small piece of the mixture—if it sizzles immediately, you’re good.
- Place the tikkis carefully into the hot oil, leaving space between each. Fry for about 4–5 minutes per side, turning once, until they are golden brown and crispy. Keep an eye on the heat; too hot and they’ll burn, too low and they’ll be soggy.
- Check for doneness: the tikkis should be crispy on the outside, tender inside, with a rich aroma of spices. If they crack or fall apart, they need a little longer on the heat or more binding ingredients.
- Remove from oil and place on paper towels to drain excess oil. Let them rest for 2 minutes before serving to allow the flavors to settle and the surface to crisp up further.
Let the tikkis rest for 2 minutes on paper towels to cool slightly and crisp up. Serve warm with chutney or yogurt, and enjoy the satisfying crunch and aromatic spice hit.
How to Know It’s Done
- Color: Golden brown and crispy exterior.
- Texture: Firm but tender, with no raw vegetable bits.
- Appearance: Uniform shape, no cracks or soggy spots.
Vegetable Tikkis
Ingredients
Equipment
Method
- Peel and cut the potatoes into chunks, then boil until just tender, about 10 minutes. Drain and mash until smooth.
- Grate or finely chop the mixed vegetables. If using raw, lightly sauté them in a teaspoon of oil for a few minutes until slightly softened, then let cool.
- In a large bowl, combine the mashed potatoes with the prepared vegetables, cumin seeds (if using), spices, chopped cilantro, breadcrumbs, and gram flour. Mix thoroughly until everything is well incorporated and the mixture holds together when shaped.
- If the mixture feels too dry, add a splash of water or lemon juice; if too sticky, sprinkle in more breadcrumbs or gram flour. Rest the mixture in the fridge for about 15-20 minutes to help it firm up.
- Divide the mixture into four equal portions. Shape each into a flat, round patty about 1.5 cm thick, pressing gently to form even shapes.
- Heat the oil in a large skillet over medium heat until shimmering and hot enough for frying. To test, drop a small piece of mixture into the oil; if it sizzles immediately, the oil is ready.
- Carefully place the tikkis into the hot oil, spacing them out to avoid overcrowding. Fry for about 4-5 minutes on each side, until golden brown and crispy, with a pleasant crackling sound.
- Use a spatula or tongs to flip the tikkis gently, ensuring they don’t break. Cook until both sides are evenly crisp and aromatic.
- Remove the cooked tikkis from the oil and place on paper towels to drain excess oil. Repeat with remaining patties.
- Once drained, drizzle the lemon juice over the hot tikkis to add a zesty brightness. Serve immediately with chutney or yogurt, enjoying the crispy exterior and tender interior.
Notes
Vegetable Tikkis Cooking Tips
- Bolded mini-head: Use a hot pan → Achieves a crisp, golden exterior quickly, avoiding sogginess.
- Bolded mini-head: Chill the mixture → Resting in the fridge for 30 minutes helps the tikkis hold shape during frying.
- Bolded mini-head: Don’t overcrowd the pan → Fry in batches to maintain oil temperature and crispness.
- Bolded mini-head: Flip carefully → Use a spatula to gently turn the tikkis, preventing breakage.
- Bolded mini-head: Adjust heat as needed → Moderate heat (160°C/320°F) is ideal for even browning without burning.
- Bolded mini-head: Drain excess oil → Place cooked tikkis on paper towels immediately after frying for crispiness.
- Bolded mini-head: Serve immediately → Best enjoyed warm for the perfect contrast of crispy exterior and tender interior.
Common mistakes and how to fix them
- FORGOT to heat oil properly → Ensure oil shimmers before frying.
- DUMPED too much vegetables at once → Fry in batches for even crispness.
- OVER-TORCHED the tikkis → Keep heat moderate; adjust as needed.
- MISSED resting time → Let tikkis rest briefly for better texture.
Quick Fixes and Pantry Swaps
- When oil shimmers, splash in a tiny piece of mixture to test heat.
- If tikkis stick, patch with a little more flour or breadcrumbs.
- Splash water if mixture feels too dry and crumbly.
- Shield over high flames to prevent over-torching the surface.
- Splash lemon or vinegar for a quick flavor brightener, especially if bland.
Prep, store, and reheat tips
- Prepare the vegetable mixture ahead of time; keep refrigerated for up to 24 hours to maintain freshness and prevent spoilage.
- Shape the tikkis and store them unfried on a plate lined with parchment; cover loosely and refrigerate for up to 4 hours without losing texture.
- Cooked tikkis can be stored in an airtight container in the fridge for up to 2 days; reheat in a hot skillet until crispy, about 2–3 minutes per side, with a shimmer of oil and a satisfying crackle.
- For longer storage, freeze uncooked tikkis on a tray, then transfer to a zip-top bag; they keep well for up to 1 month. Fry directly from frozen, adding a minute to cooking time, until golden and hot inside.
- Reheating frozen tikkis may cause slight loss of crispness; refresh in a hot skillet or oven at 180°C/356°F for best results, looking for a shimmer of oil and crispy surface.
Frequently Asked Questions
1. Should I use hot or cold potatoes for the tikkis?
Use cooked, mashed potatoes that are not too wet. Cold potatoes help the mixture firm up, making shaping easier and preventing sogginess during frying.
2. Can I use sweet potatoes instead of regular potatoes?
Yes, you can substitute sweet potatoes, but expect a slightly sweeter flavor and softer texture that might need a touch more binding.
3. How do I know when the tikkis are perfectly cooked?
Fry the tikkis on medium heat until they are golden and crispy, about 4-5 minutes per side. Too hot, and they burn; too low, and they turn soggy.
4. What if the mixture is too wet or sticky?
If the mixture feels too sticky, add a little more breadcrumbs or gram flour. If it’s too dry, a splash of water or yogurt helps bind everything together.
5. Can I freeze the tikkis for later?
Yes, freezing uncooked tikkis on a tray first prevents sticking and shape loss. Fry directly from frozen, adding about a minute to cooking time.
6. Is baking a good alternative to frying?
Yes, you can bake the tikkis at 200°C/392°F for about 20 minutes, flipping halfway, for a healthier, less oily version.
7. What oil is best for frying these tikkis?
Use a neutral oil like sunflower or canola, heated to around 160°C/320°F. Proper temperature ensures crispiness without burning the exterior.
8. Can I omit herbs or use dried herbs instead?
Adding fresh herbs like cilantro and mint at the end gives a bright, herbal note that balances the spices and adds freshness.
9. How should I flip the tikkis without breaking them?
Use a slotted spatula to gently flip the tikkis. Let the edges crisp up fully before turning to avoid breaking them apart.
10. When is the best time to serve the tikkis?
Serve the tikkis immediately with chutney or yogurt. They’re best warm, when the exterior is crisp and the interior tender and flavorful.
These vegetable tikkis are a reminder of how simple ingredients can come together into something deeply satisfying. Making them at home lets you control the spice and crispness, plus it’s just plain fun to get your hands a little messy in the kitchen.
Whenever I fry up a batch, I think about all the times I’ve shared these with friends or enjoyed them as a quick snack after a long day. They’re imperfect, a little rustic, but each bite carries a piece of nostalgic comfort that’s hard to beat.